
MoveTo Installation & Basic Configuration Guide
- Step 1 : To install plugin first you have to login into wordpress website admin area. Then go to the plugin page where all plugins are displayed. In plugin page you will see “Add New” plugin button in above page.
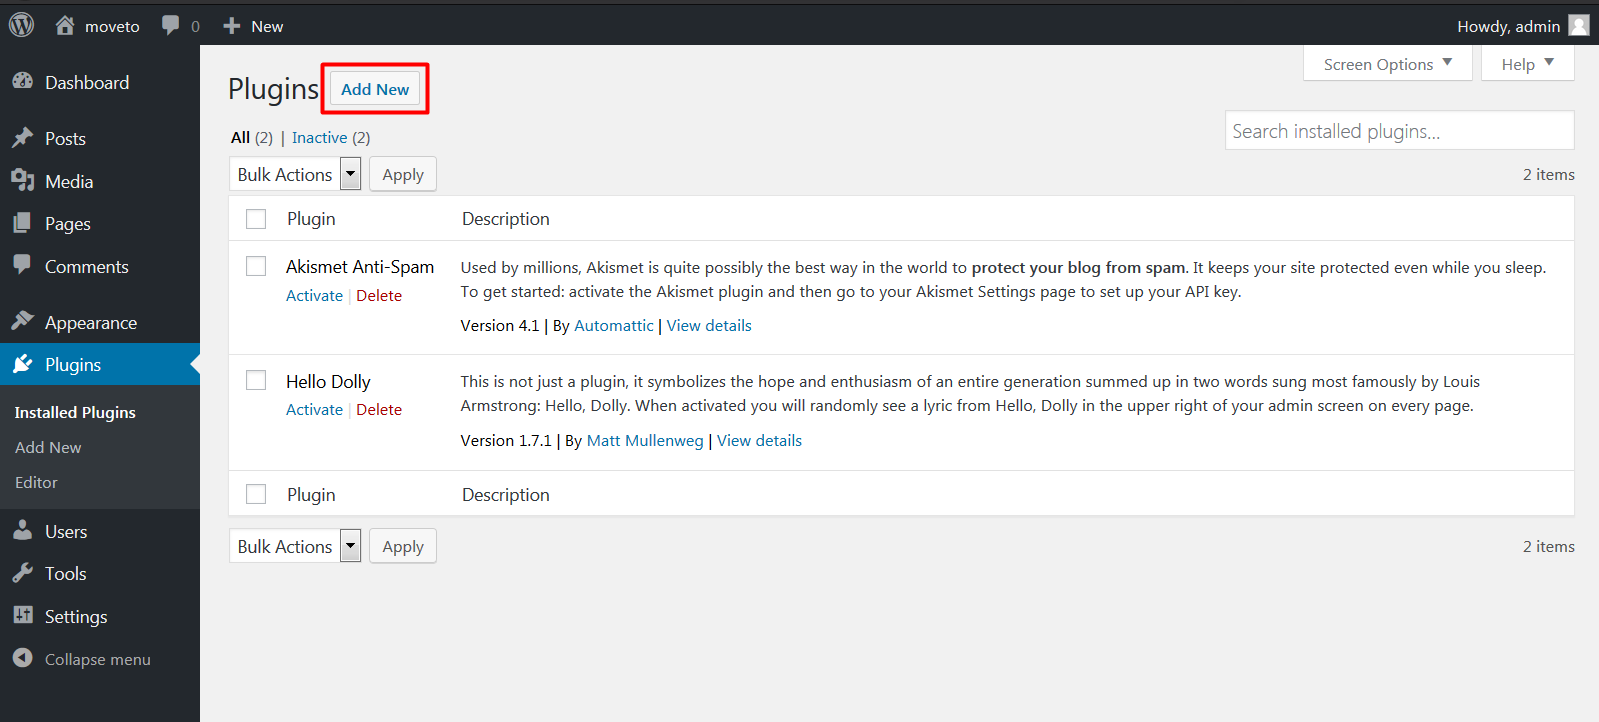
- Step 2 : Now click on “Add New” Button then it will redirect to another page and in that page you can see one button on the top of the page i.e. “Upload Plugin”. Click that button and it will show you a “Browse button” using that button you can upload this plugin.
- Step 3 : You already have a zip file of MoveTo plugin in your downloaded files from Envato. Click on “Upload plugin” button and browse plugin zip file from your computer. And then click on “Install Now” button and upload plugin. There is also another way to install this plugin.
- Step 4 : Another way to install this plugin is: You have to go in website root directory which is displayed in the screenshot below.
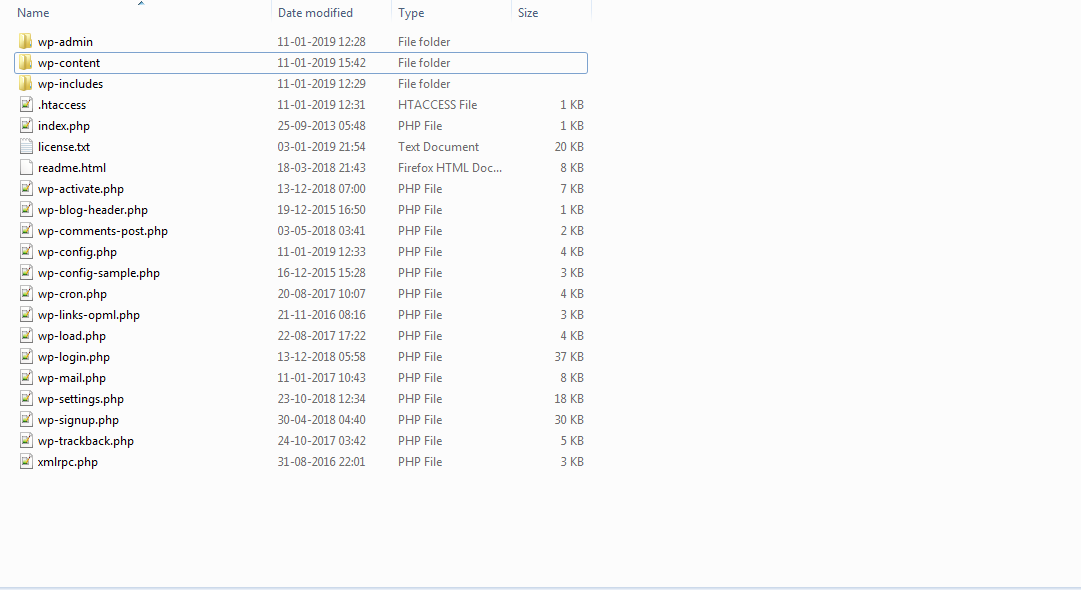
- Step 5 : Now you have to go in wp-content/plugin/ then in plugin folder you have to paste your plugin folder after all the above process is done,you can activate this plugin now.
- Step 6 : To activate this plugin you have to go in plugin listing page and this installed plugin should be displayed there as shown below.
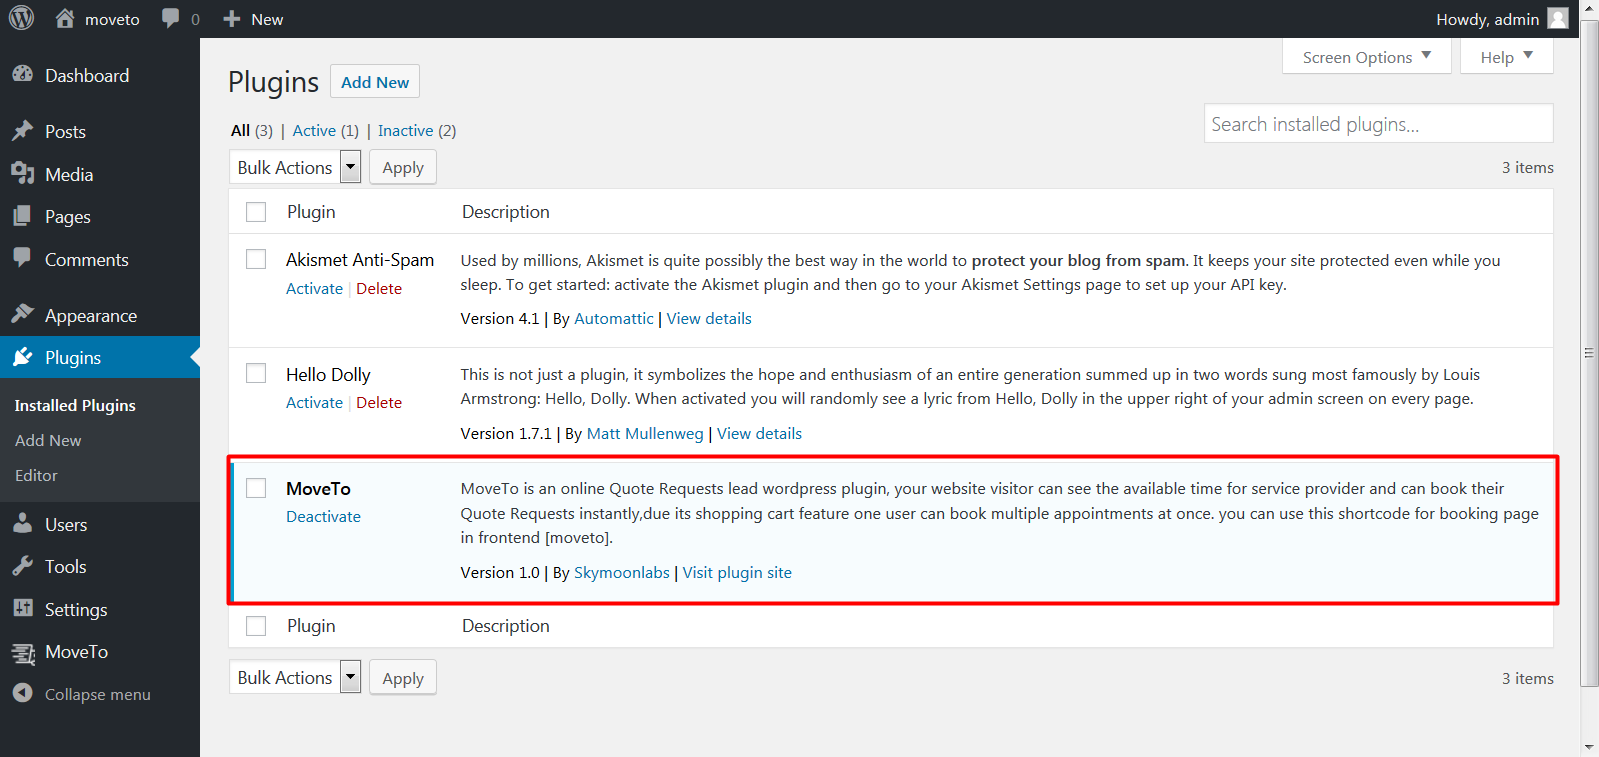
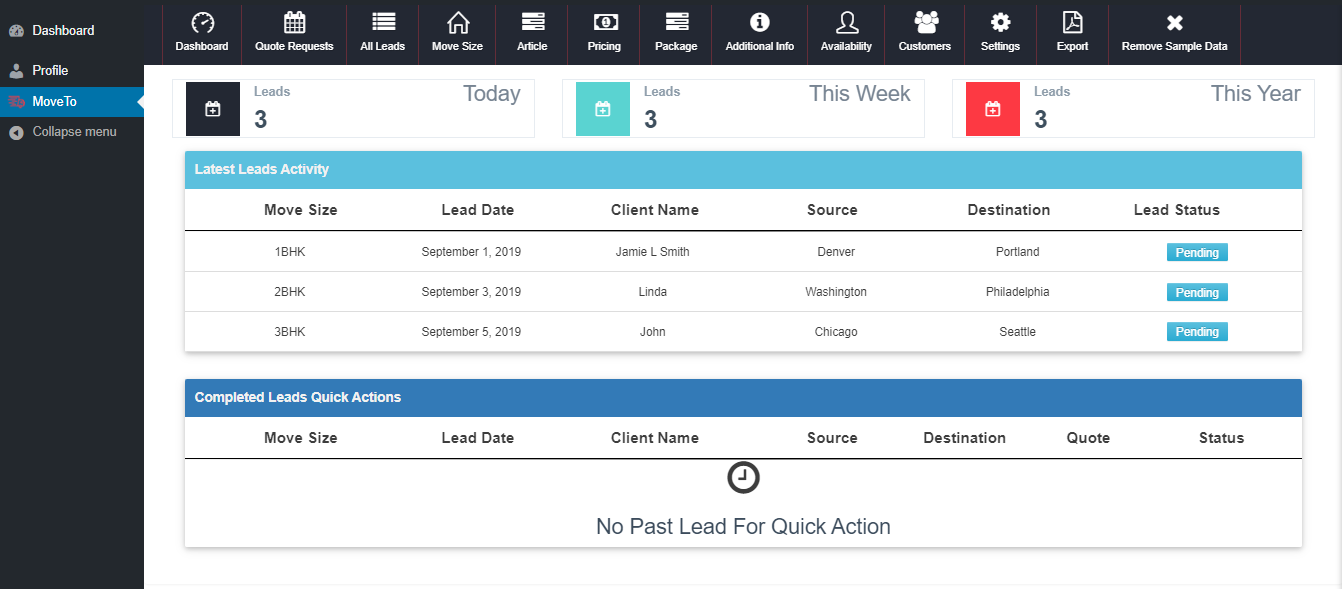
- Step 7 : Now, to activate this plugin click on “Activate” link shown below . After all the above process this plugin will be activated. And it should show MoveTo menu options in left side of the menu bar. After that click on MoveTo plugin menu, it should display something like this which is displayed in the screenshot attached below. Here “Sample Data” will be displayed to understand the process easily. Now you can see the Dashboard tab.
Step 8 : Use shortcode [moveto] in your page or website for the frontend.